Part 1: Multi-Tile UV Mapping
Multi-Tile UV Mapping Part 1
(This tutorial is designed around Maya and Mudbox. Several of the concepts here can be transposed into other 3d software packages that have UV grid control)
STANDARD UV MAPPING vs. MULTI-TILE
(This is a basic overview of UV maps and resolutions, if you’re already familiar with this skip ahead to The Multi-Tile Paint found in Part 2.)
Why use a Multi-Tile UV solution over Standard UV mapping?
The quick answer is maximum texture resolution.
This technique becomes incredibly useful when dealing with large terrains, or characters which need to have seamless subdivision surface attributes assigned to them;
i.e.there no way to cut the geometry into smaller sections without ruining the tangent of the subD.
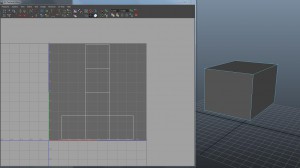
Generally when an object it UV mapped, it’s unwrapped into a flat 0,1 UV coordinate space as seen in the UV editor
Once your UV maps are created, it’s now time to create a shader. In the event you’re using non-procedural textures, you need to determine resolution.
Is it seen from a distance? Is it up close and in need of detail?
Basically is the texture as low as 512k, or as high as 8192k?
This tutorial won’t go into memory management and high resolution textures, but basically it’s more efficient to load several smaller textures (2k or 2096 for example than larger textures), for the individual user or small shop not using a robust pipeline, this can be almost essential.
Even in the event that the user is utilizing an 8k texture, it’s not exactly true.
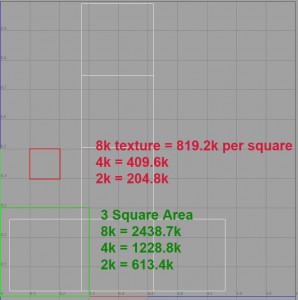
If we divide each square up in UV space we actually only have 819.2k per square.
So looking at the example below, roughly each side of the box has a resolution less than 2438.7k
Probably plenty for most renders, but if you have multiple 8k textures it will start becoming problematic as the 3D program of choice has to load these these into memory, especially if your render engine of choice loads them up front.
As you can also see, the resolution for actual coverage area exponentially drops as we get into more common 2k texture usage.
Another issue is painting/creating/extracting 8k textures. Again, this is extremely taxing on a system and without enough ram and a good video card you might find yourself working very slowly or even crashing.
With the advent of software packages such as Mudbox and Zbrush, the user can now extract displacement maps from high resolution sculpts. One of the problems that often arises from extracting displacement maps is what is seen sculpted, is often not what is seen in rendering.
Part of this can be attributed to user render settings, but more often than not, it’s also based on the information written out during the extraction process.
The MULTI-TILE
Even with a 8 or 4k map we’re really not getting full coverage. We have to share the area with all pieces of the Geometry, even those that might go unseen or are further away from camera and don’t require all that resolution space. So how do we maximize our pixel resolution?
And the better question, how do we paint a seamless texture/displacement map across these?
The first thing to do is set up our UV grid in Maya so we can be organized. (And so it shares the same UV layout as Mudbox)
The default UV window in maya is set for the standard 0,1 single tile
To make sure you have a clean UV layout that “talks” to mudbox, and for organizational purposes you need to change the UV grid.
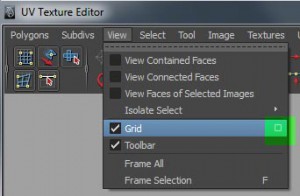
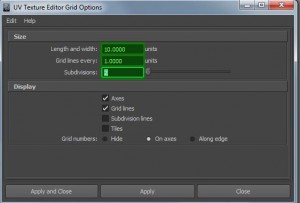
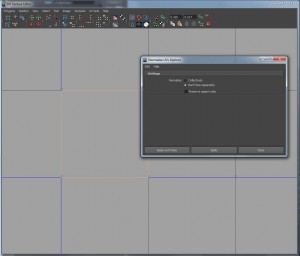
Open the UV Texture Editor and in the window under:
view > grid > options
Change the settings to
Length and Width: 10
Grid lines every : 1
Subdivisions : 2
Leave everything else alone.
You can click the ‘tiles’ option if you like, but that doesn’t have any real effect other than darkening the tile borders. It’s visual help only, and doesn’t do anything else to effect mult-tile UV mapping.
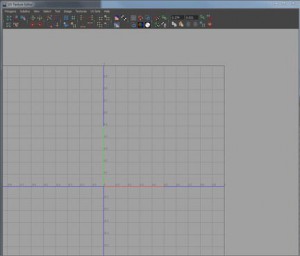
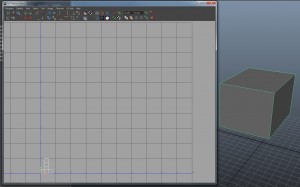
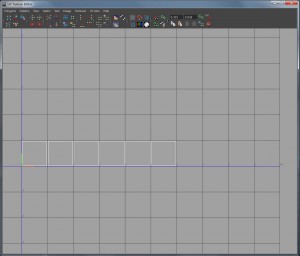
Now looking at our UV Texture Editor it’ll look exactly the same as figure 3, until we select an object (make a default primative cube and select it.)
And we’ll notice that the Default UV map now falls into the first “tile”
Maya is now set up to visually layout and deal with Mult-TIle UV maps.
Why is this important? Because just like any other UV map, you need to be inside the 0,1 range of each tile. No crossing the borders with sloppy maps. Having the tiles set gives the user a visual boundary of what’s ‘legal’ and what’s not.
Without this new grid set up it’ll make it really difficult to deal texture assignment, just like any other UV map.
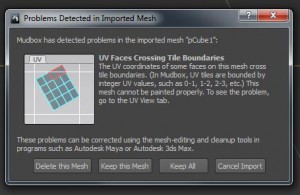
Also you’ll be able to trouble shoot quickly if a message like this comes up in Mudbox
You can ignore it and paint away, but there’s a pretty good chance mudbox will crash. Even if you manage to survive a crash and paint away, you’ll still need to import good UV’s into mudbox later if you want to extract your map. If you see this message come up, check your UV’s with a fine tooth comb and make sure everything is ‘legal’
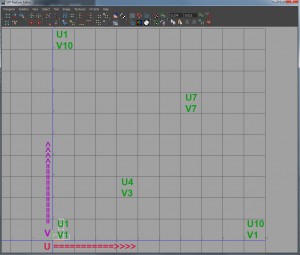
We also now have a U and V coordinate system set up, with each tile representing it’s coordinate I.D.
As always, U is horizontal and V is vertical, but now each tile has it’s own coordinate number as well. As seen above (figure9), four tiles over and three tiles up is U4_V1 in coordinate space.
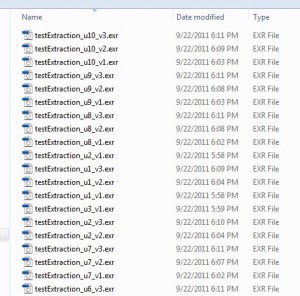
This helps not only from an organizational point of view, but when Mudbox saves out multiMaps it’ll give them a coordinate ID relating to which tile they belong to.
UV Mapping with Mult-Tile
So now that the grid is set up, we’ll continue using the simple box/cube object and set it up for a multi-tile texture assignment.
So if you haven’t done it yet, create a simple Cube Primitive in Maya. For our purposes make it perfectly square.
All we’ll going to do here is select the edges of the box in the UV Texture Editor and use the UV ‘cut’ tool to separate them from their adjoining faces. Basically making a UV per face, or six discontinuous maps.
For speed in learning this, I’d recommend doing this:
1. Select all the edges of your cube in the UV editor and use the CUT UV EDGES tool.
This will make each face a ‘discontinuous’ UV map.
2. Select all the UV points in the window and normalize them. I recommend opening the Normalize option window and switching to “Each Face Separately”.
We don’t need to preserve aspect ratio for this since it’s a square cube, but if you’ve decided to try something else as a primitive or other Geometry you may want to click that box.
3. Next I recommend scaling the UV borders in from the tile’s edge.While not necessary having UV’s to close to the borders, or even to close to each other in UV layout can cause problems when extracting a displacement map in Mudbox (and Zbrush). You can either scale by hand, or script a 5% scale reduction. I use a quick mel command like this:
polyEditUV -pu 0.5 -pv 0.5 -su 0.95 -sv 0.95 ;
4. Now we need to separate each one into it’s own tile.
This can be someone laborious the first few times out, but it’s worth it to make choices and decisions about what goes in what tile. When doing character work I often have certain layouts I like to use based off experience.
For our tutorial though, the cube is arbitrary and we’ll just lay them out quickly across the first 6 tiles.
I can just simply select a single UV and then tell Maya to select shell border to grab a single shell to move it into the next tile over. Most of the time this is fine for initial UV layout, but what if I need to to fall into the exact same UV position of tile one? For example I have a painted texture already that works, I just need to separate each tile out to be EXACTLY in the same UV coordinate space, just different coordinate tile?
Easy.
Again, we’ll use a mel command.
polyEditUV -u 1 -v 0 ;
Will move the selected shell exactly one tile over in U to the right, or in positive U
polyEditUV -u -1 -v 0 ;
Will move the selected shell exactly one tile over in U, but this time to the left, or in negative U
polyEditUV -u 0 -v 1 ;
Will move the selected shell exactly one tile up in V, and of course negative value one tile down.
I have a series of buttons in my interface that say “UV UP, UVDOWN, UV LEFT, UV RIGHT” that I use for doing layout. This assures that if I need to shift a tile for whatever reason, I’m only shifting it in it’s tile coordinates, not it’s true UV texture coordinates.
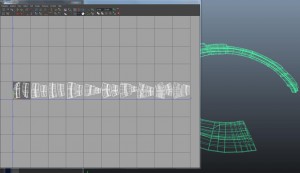
However you decide to shift your UV’s, in the end they should look similar to this:
We’ll explore what to do with this and how to handle it for rendering in the next sections.
Tip:
Obviously you don’t need a single polygon face per UV tile. You can stack as many areas in a tile as necessary. It can really depend on the size/aspect ratio of your maps.
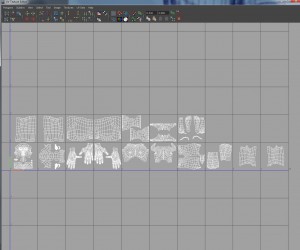
Here are a couple of more advanced examples of Mult-Tile Layout
This one was for a walkway that needed a high level of displacement and paint since the camera was following along the path for the shot.
This one is for a female character for a client.
The options are pretty endless once you follow the basic rules.
Tags: CG, Vray, multiple UV, multiTile, multi-tile, UV mapping
